Functionality available by default only to Key Admin users.
With this functionality, the user has the possibility to create custom reports.
A Custom Report is created in 3 Steps:
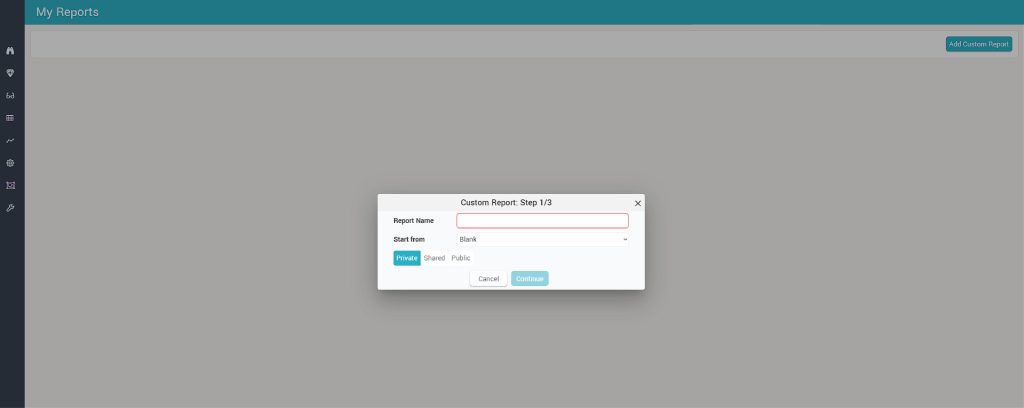
1st Step
1. Define the Name of the Report.
2. Select if the custom report should use as base a preexisting report. When selecting to start from a pre-existing Custom Report, the 2nd step is skipped and all parameters are copied from the pre-existing report. The user is taken directly to the Column definition in step 3 where all columns are already selected as in the pre-existing report. From there, the user can change the columns and also go back to the report parameters screen (step 2), now being able to change them.
3. The report can be “Private” (visible only to the user who creates the report), “Shared” with a user he created or the parent user, or it can be “Public” (visible to all users).
2nd Step
The user has to define the following parameters:
1. Default Timeframe of the report and if changes in Settings Area (filters) should be possible or not. Bu default, the Timeframe is the one defined in the general Settings area.
2. Default Granularity and if changes in Settings Area (filters) should be possible or not.
3. Second Dimension and if changes in Settings Area (filters) should be possible or not. This parameter defines if sub-rows will be used (similar to sub-rows in Timeline).
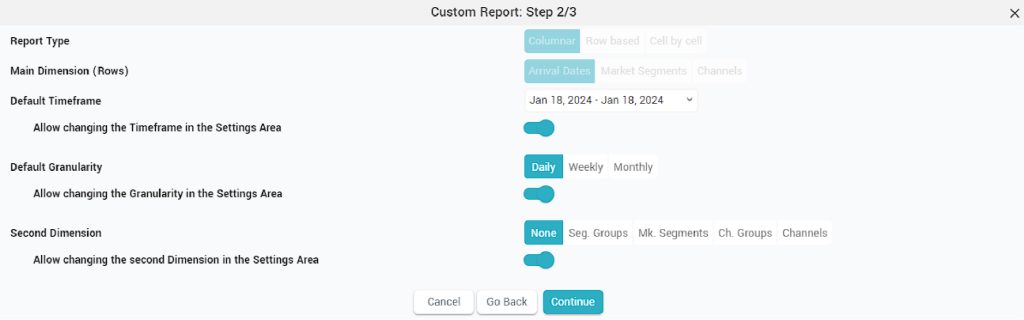
NB: Report Type and Main Dimensions (rows) cannot be edited in this version. When coming from a blank template, the parameters are prefilled as above.
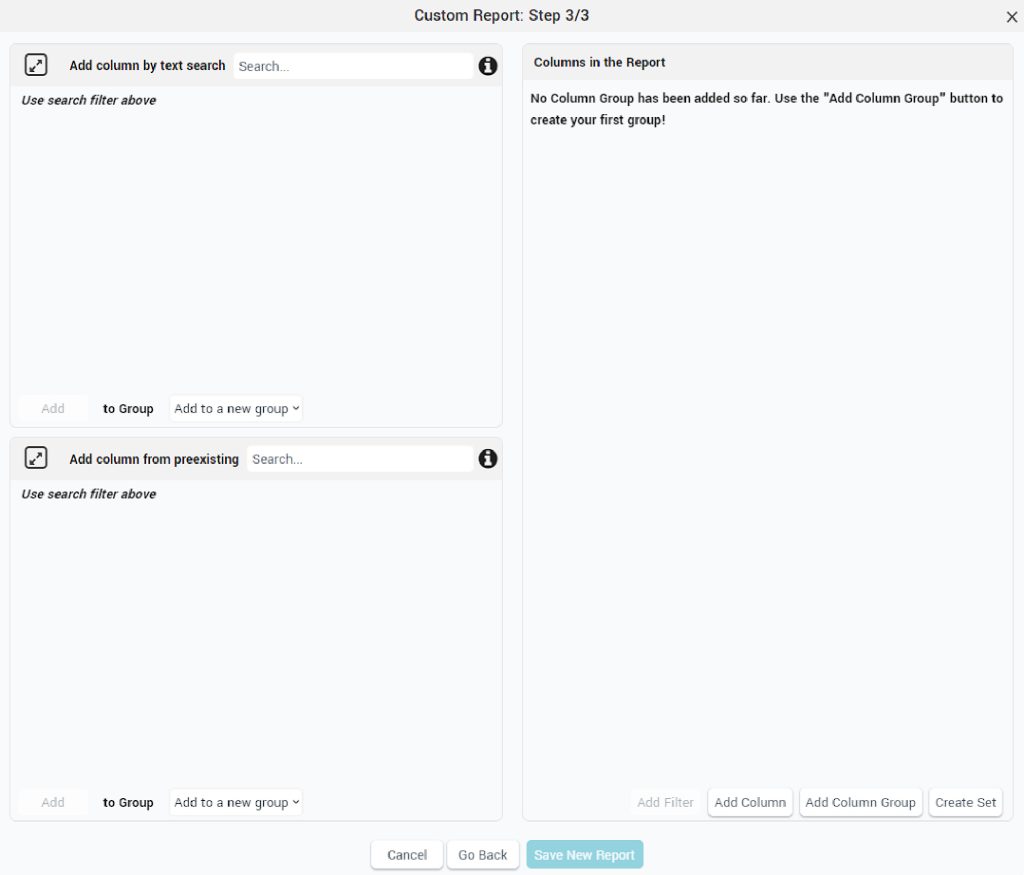
3rd Step
Column Groups are created and managed here. There are 3 sections inside this step.
1. Add new column – in this section the user can define a type of column based on the variety of parameters. The Columns can have PMS data, RECO data (RECO rate, SENT rate etc.) or Market Data (LAR / BAR rate shopped for a particular PAX, on a particular Channel and Market Occupancy).
2. Add preexisting column – the columns that already exist in the app’s reports or a column from a custom report previously created are listed here. There is a search option helping the user to find the desired column more easily.
3. Columns in the Report – this section will show the columns that are added to the custom report. Column groups must be added here, before adding any column from section 1 and 2. The columns and column groups can be Edited, Deleted or Hidden. When deleting a group, all columns from that group are also deleted. Columns can move from one group to another and no column can exist at top level, meaning they must be inside one group or another.
NB: A newly created report which is not “hotel specific” (does not contain Market Segments, Channels, Room Types or Competitors as columns) will be visible to all hotels the user has access to; otherwise the report is available only for the current hotel.