Setting up the seasons and marking the event days in the app is extremely important. This helps the optimization algorithm to yield much better results; plus it gives you the ability to analyze and manage the performance of the hotel in a granular way, with options to filter, aggregate, or compare per season and event throughout the entire app.
The screen has 3 main areas:

1. The Control Bar
The Control Bar offers the following functions:

a. Timeframe
You control here the start month of the data grid displayed below and also the number of months to be displayed beyond the current month.
b. Edit Seasons
By clicking this button, you can manage the seasons for the hotel:
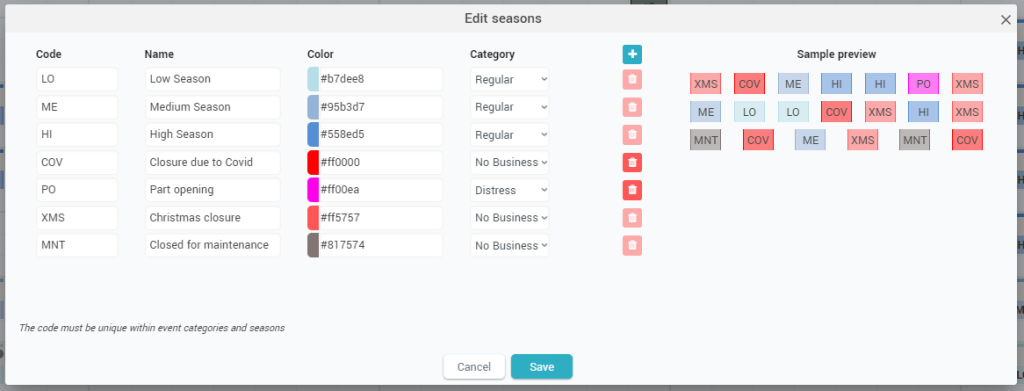
The popup that appears (shown above) displays the list of all seasons currently defined. By default, the app creates 3 seasons for every new hotel onboarded: Low, Medium and High. You have the possibility to change them and add/delete seasons to your preference.
Each season must have a code (max 3 letters), a name, a color (for visual difference throughout the app) and a category.
The “Category” column is important for the optimization algorithm. It holds 3 possible values:
- Regular – this is the “standard” category for a season. It tells the app that the season is a “regular “normal” one, during which the hotel business runs normally.
- Distress – this category marks the season as an irregular season. Irregular seasons are periods when the hotel business is affected by major outside events that disrupt the normal pickup trends and the regular customers (e.g. war, diseases, economic turmoil, etc).
- No Business – this category marks the fact that the hotel was closed for business during the respective period. Now it might be that the hotel still accommodates guests (e.g. during the COVID-19 pandemic some hotels were used by the government as “in-place” quarantine areas), but it’s not open for normal business.
The “+” icon adds a new season to the list.
The red “delete” icons for each season will delete the respective season from the list.
If the delete icon is disabled, it means that there are days (in the past or in the future) that are marked as belonging to the respective season; as such you cannot delete that season.
To be able to delete a season you must ensure that there are no days (past or future) when the respective season is selected.
c. Edit Ev. Categs.
Clicking this button allows you to edit the event categories. Events in the app can be grouped into categories; this again helps the optimization algorithm to analyse similar events (from the same category) for business trends:
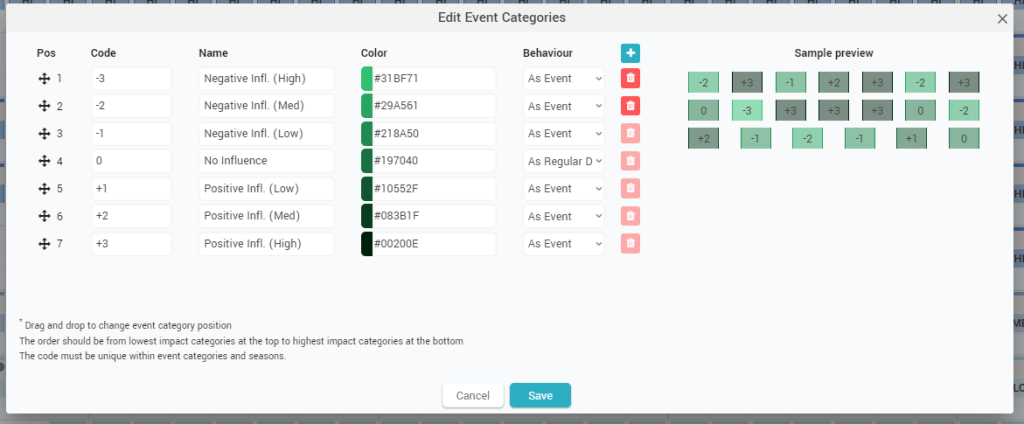
The above popup opens after clicking the button. By default, the app creates 7 categories as seen in the image above. However, you can change the categories to your preference.
Best Practice: It is important to create the event categories in such a way that the events assigned to them will have a potential similar impact on the hotel’s business. In other words, having a category like “Local Events” and another like “Regional Events” is not very good, as local (or regional) events may have both positive and negative influences on the hotel business. “Public holidays” is also a bad category for the same reason: some holidays will bring in tourists while others will only reduce the number of business travelers with no positive influence on leisure tourists.
The event categories must have a code (max 3 letters), a name and a color.
You must also choose the “Behaviour”:
- As Event – this means that the events in the respective category must be treated by the optimization algorithm as event days; as such their business and forecast is influenced by other similar events.
- As Regular Day – this means the events in such categories are treated as regular days by the optimization algorithm: the business and forecast is influenced by the season they are in, not by similar events. As such, the events in these types of categories are to be added purely for easier analysis and monitoring purposes.
The “+” icon adds a new category to the list.
The red “delete” icons for each category will delete the respective category from the list.
If the delete icon is disabled, it means that there are events (in the past or in the future) that are added in the respective category; as such you cannot delete it.
To be able to delete a category you must ensure that there are no events (past or future) in it.
d. Import / Export Events
With these two buttons you can import or export a list of events from / to and XLS file.
When exporting, the file looks like this:
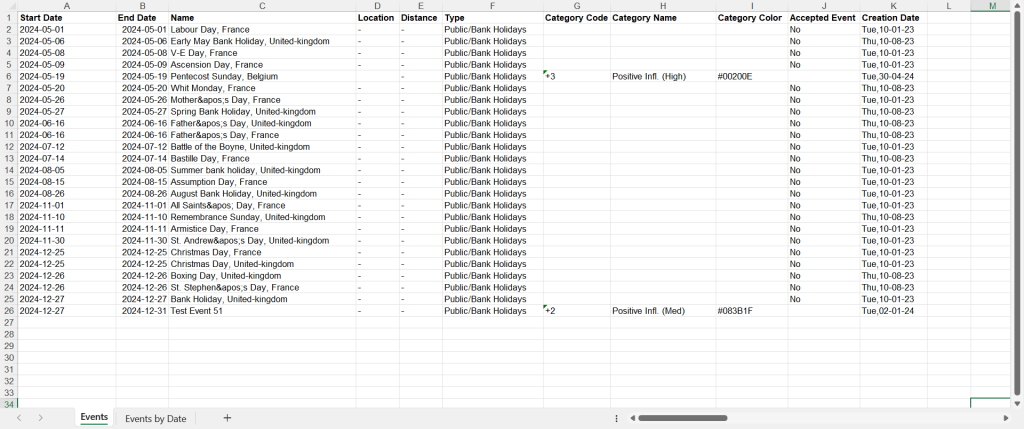
The columns are quite self-explanatory. The “Accepted Event” column shows if the event was added in the app to be analyzed and monitored or it’s just an event that the app has found online.
When importing events, the XLS file used for import must have the exact same structure as the one exported by the system.
Best Practice: it is recommended to export an event file first from a different hotel and then use it as a “template” for the import process.
2. The “Standard” Tab
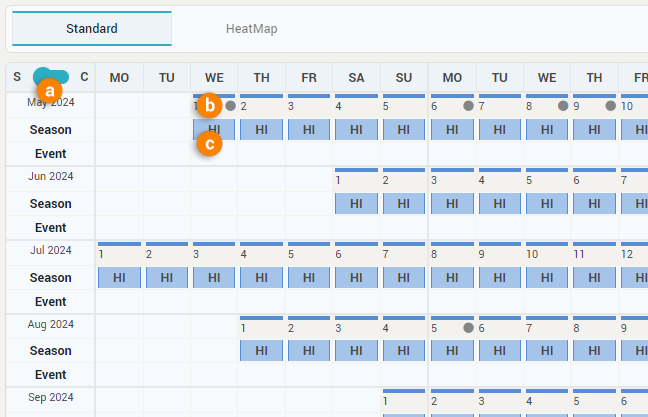
The period selected in the control bar is displayed in a grid where each main row shows a month and each column shows the info per day, order by day of week (standard view) or by day of month (compact view):
a. Standard View vs. Compact View
You select with this toggle if the grid is displayed in standard view (columns arranged by Day of Week) or in compact view (columns arranged by Day of Month). In compact view, the grid looks like this:
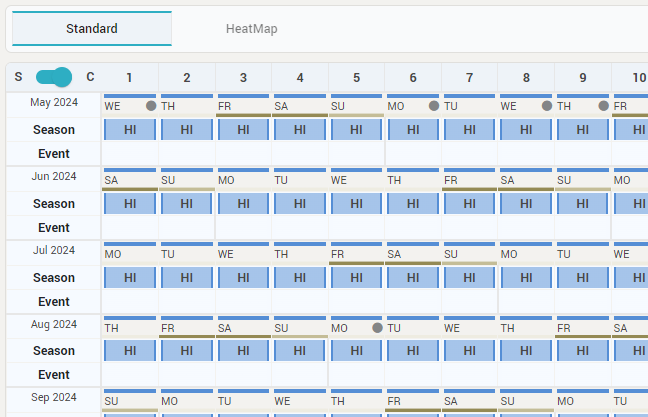
Regardless of the view, each “cell group” shows the date at the top sub-row, the season in the middle and the event in the bottom sub-row (if an event was added on the respective day). Also, the actions that can be performed when clicking on the cells are the same.
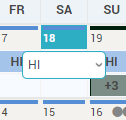
b. The date sub-row cell
This cell shows the day of the month in standard view or the day of the week in compact view.
It also displays a quick info if there are any public events found by the app online that were not added by any user to be analyzed. This is represented by the gray dots to the right of the cell.
- one dot shows there is one public event on that day
- two dots show there are two public events on that day
- a plus sign and a dot shows there are three or more public events on that day
When you move the mouse over the cell, the app will display the mini day inspector:
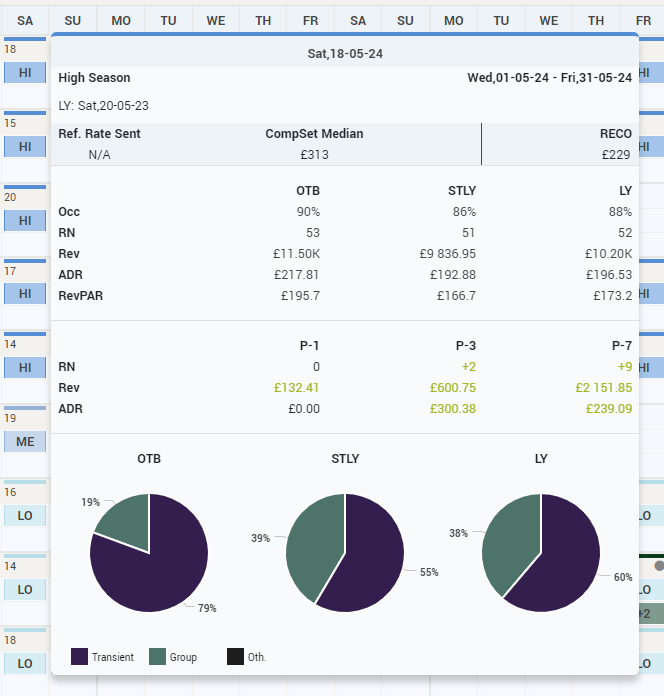
To learn more about the mini day inspector, please check the “Mini Day Inspector” page.
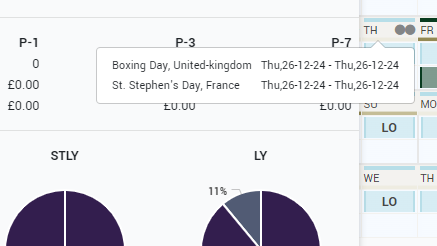
If there are any public events on the respective date, on mouseover you will also see these events:
c. The Season / Event sub-rows cell
The actions to add / change / delete seasons or events are done by clicking the cells for Seasons or Events. There are 4 actions that can happen on click, you select the “active” one by right-clicking on the cell in which case the app will display a context menu:
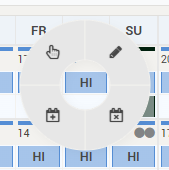
The actions in this context menu are:
- Select period – this action will allow selecting a longer period in the grid to change the season or add events – this is the default action
- Change season – this action allows on-the-spot changing of the season:
- Add Event – this allows adding a new event on the respective day. See below how events are added for more details
- Delete all events – this option will delete all events added for analysis on the respective day (for the selected property)
When the “Select period” is the “active” action, a click on a date will mark the start date of the period; a subsequent click on a date will mark the end date of the period and will trigger the below popup:
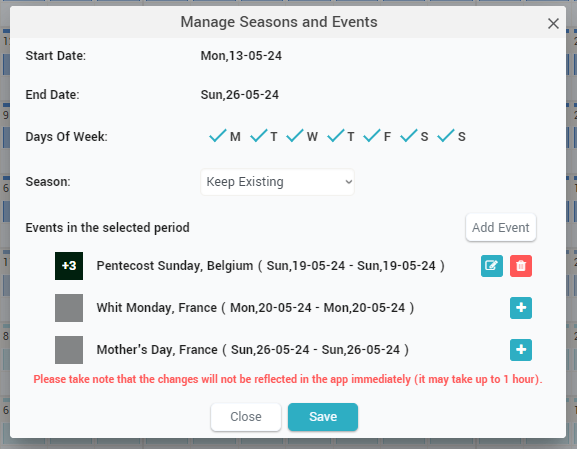
In this popup, you can choose to change the season of the selected period or keep the existing values and you can manage the events in the period.
A list of events (both added already for analysis but also public events) is displayed. You can edit / delete an existing events and you can also add a public event to be analyzed.
You can also choose to add a new event manually by clicking the “Add Event” button.
Adding or editing an event looks like this:
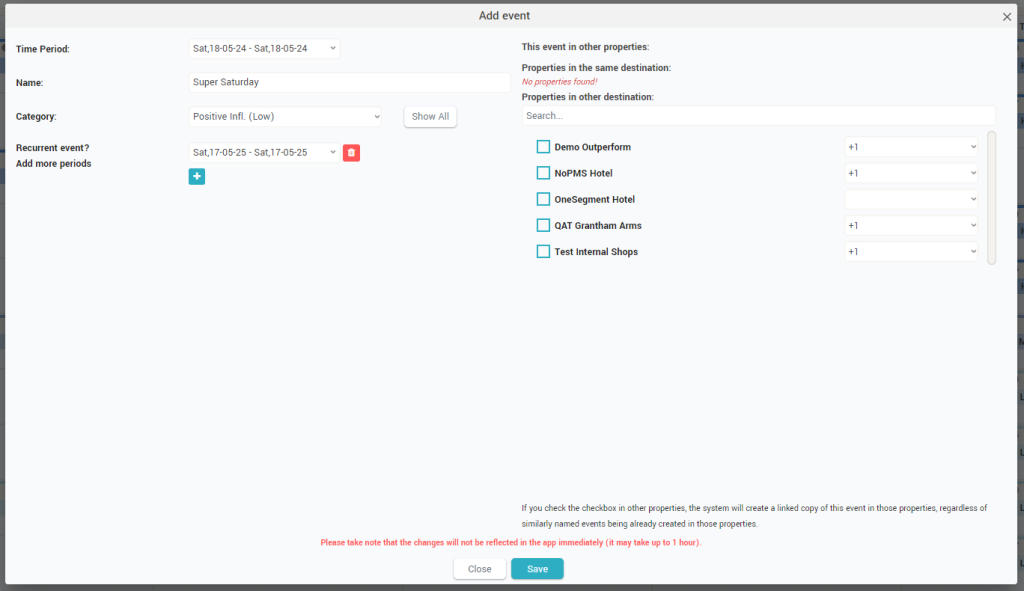
The event must have a period defined and a name. It must be added into an event category (you can click “Show All” to see which existing events were added to the selected category to get some help deciding on the best category).
If the event is recurrent, you can add more periods to it.
Remember: It is important for the optimization algorithm to create multiple periods for the same event in case the event is recurrent rather than creating separate events with the same name.
On the right-hand side, you can choose how this event will be analyzed for other properties. This is a “shortcut” function: you can quickly add the same event to other properties (e.g. properties in the same city or country).
If you choose to add the event to other properties, you must select the event category (for each of those properties) where the event will be added (other hotels may have different categories).
Remember: If the event is added to other properties, a “linked” copy of the event will be created in those hotels regardless if the event was previously added manually in those hotels (the system will not check nor notify this).
3. The “HeatMap” Tab
When selecting this tab, the grid will display a heatmap where you can quickly see (color-coded) the forecast calculated by the system and also in each cell you can see the occupancy on the books:
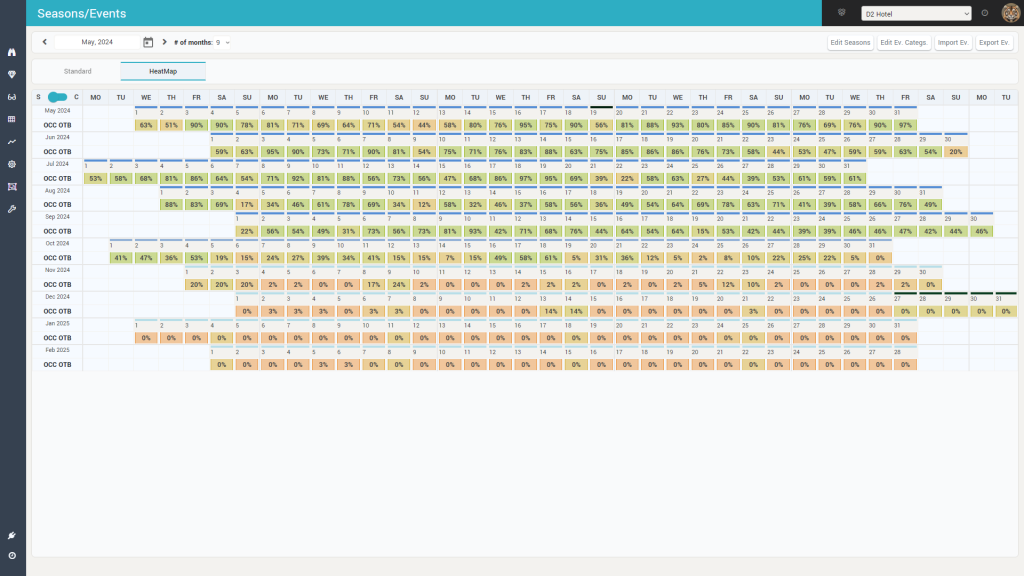
When hovering the mouse over a cell, the app will display the actual data:
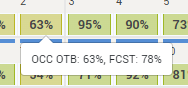
You can use this heatmap view to quickly assess if the defined seasons and events are accurate.