The RMS offers an “auto-pilot” feature, which is defined as a series of “workers” that can be defined by the user.
Each “worker” is essentially an automatic process performed by the system at given time and frequency, for given timeframe and under given conditions (working period, timeframe filters).
The “job” each worker performs is defined by the “business rules” definition of each worker.
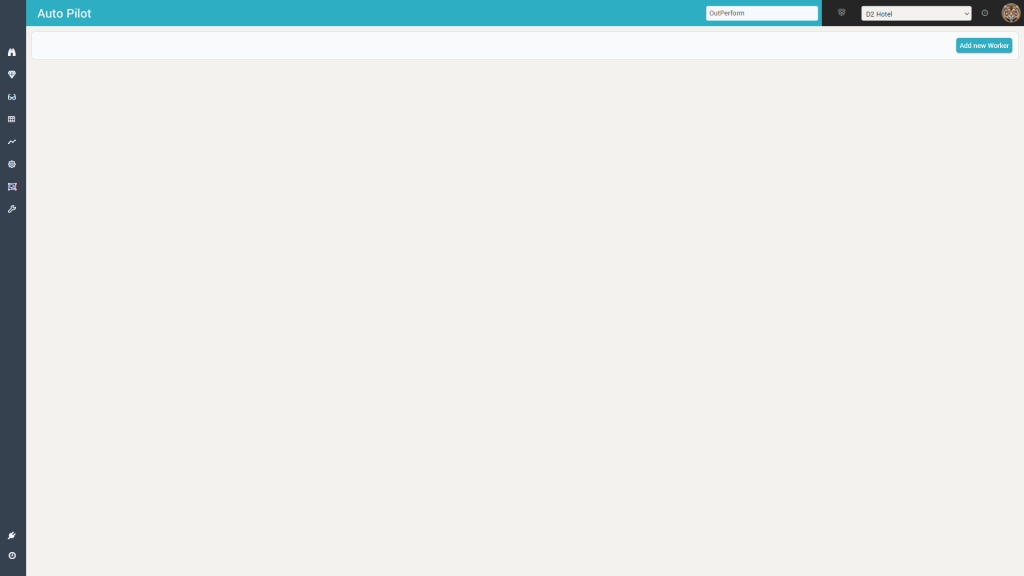
When first accessing the screen, there is no auto-pilot created:
By clicking the “Add new Worker” button, you can create a new worker:
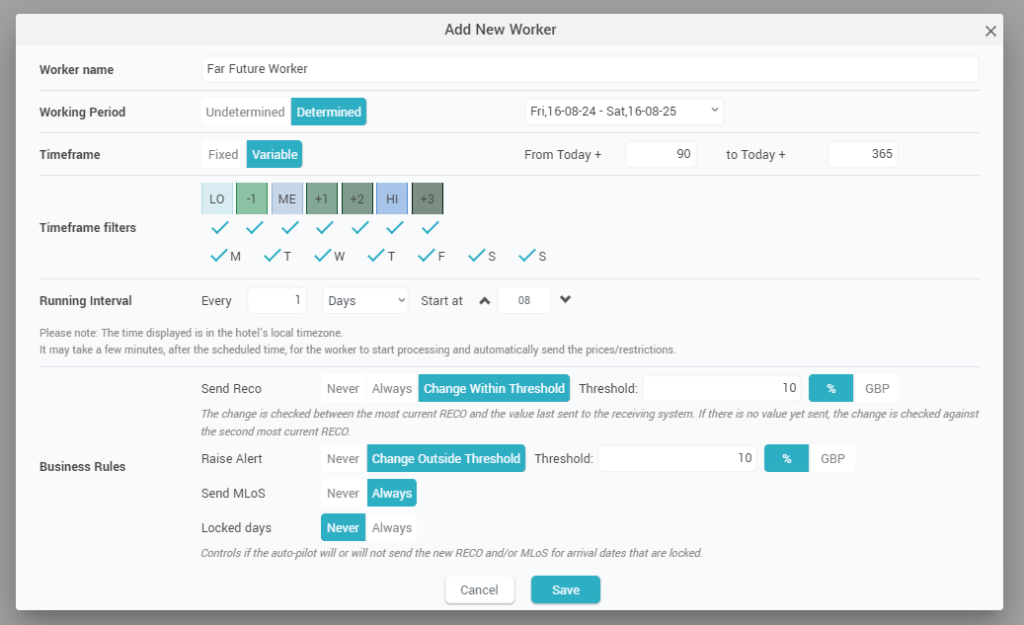
Each worker has the following attributes:
- Name: you use the name to identify the worker in the worker list (seen below) and in various other locations in the app (e.g. the “Price Adjustments Log” or anywhere the
 icon is displayed)
 - Period: the period of time when the worker is “employed”. Most of the time this would be “Undetermined”, meaning the worker will “exist” indefinitely. However, you can have the worker be “active” only for a fixed period (determined).
- Timeframe: the worker will do the selected jobs (Business Rules) only for arrival dates within this time period. This period can be a fixed period (which will not change as time goes by) or it can be variable. If variable, you define it as a period of time relative to the current date; as such every day the timeframe is “moved” forwards by one arrival date.
- Timeframe filters: you can further “refine” the list of arrival dates the worker will do its “job” by filtering out arrival dates based on seasonality / event categories and / or by Day-of-Week.
- Running Interval: this defines the “schedule” by which the worker will do the “job”. The schedule can be defined on a daily basis (every x days) or hourly basis (every x hours).
- If defined on a daily basis, you can also specify the time at which the worker should do the “job”
- If defined on an hourly basis, you can specify the start hour and the end hour during which the worker will do the job (in this case the worker will work every day during specified hours). For example, if the worker is defined to do the “job” every 3 hours starting at 7AM and ending at 8PM, it will run at 7AM, 10AM, 1PM, 4PM and 7PM.
- Business Rules: these define the “job” the worker will actually do. Currently there are 3 types of jobs a worker can do + a condition:
- Send RECO: this is the most important job and it involves the worker “liking” the RECO and automatically sending it to the receiving system. There are two options here (apart from the “Never” option):
- Always” if this is selected, the worker will automatically “like” the RECO for all arrival dates in the timeframe (filtered if any filter is defined) and send the new rates to the receiving system
- “Change Within Threshold”: if this is selected, the worker will first check by how much is the RECO bigger or smaller than the last rate amount that was sent, for each arrival date (defined by the timeframe and filters). If the difference is within the defined margin (threshold), the worker will “like” the RECO and send it. If the change is outside the threshold, the worker will not do the “send RECO” job for the arrival date in question.
The threshold can be defined as percentage from the last sent rate or as an amount.
- Raise Alert: this job goes somewhat in conjunction with the “send RECO” job. If this business rule is set on “Change Outside Threshold”, the worker will again check the RECO by how much is it different than the last sent value and, if the difference is bigger than the given threshold (again either in percentage or in amount), it will generate an alert. The alert is visible throughout the app like any other type of alert.
- Send MLoS: if this job is on “Always”, the worker will send any change on the Min LoS restriction that is suggested by the system automatically (again, only for the arrival dates within the defined timeframe and filters).
- Locked Days: this is actually a condition, not a job. If the selection is “Never” (default), the worker will not perform any sending job on the dates marked as “locked” (having the
 icon). It will still raise alert if such job is defined. If this is “Always”, the worker will disregard any lock information for the arrival dates it is allowed to “work on” and will perform all jobs on all dates.
- Send RECO: this is the most important job and it involves the worker “liking” the RECO and automatically sending it to the receiving system. There are two options here (apart from the “Never” option):
Once multiple workers are defined, the worker screen displays all of them. They are sorted based on their “last modification date”, in descending order (so the “freshest” ones first):
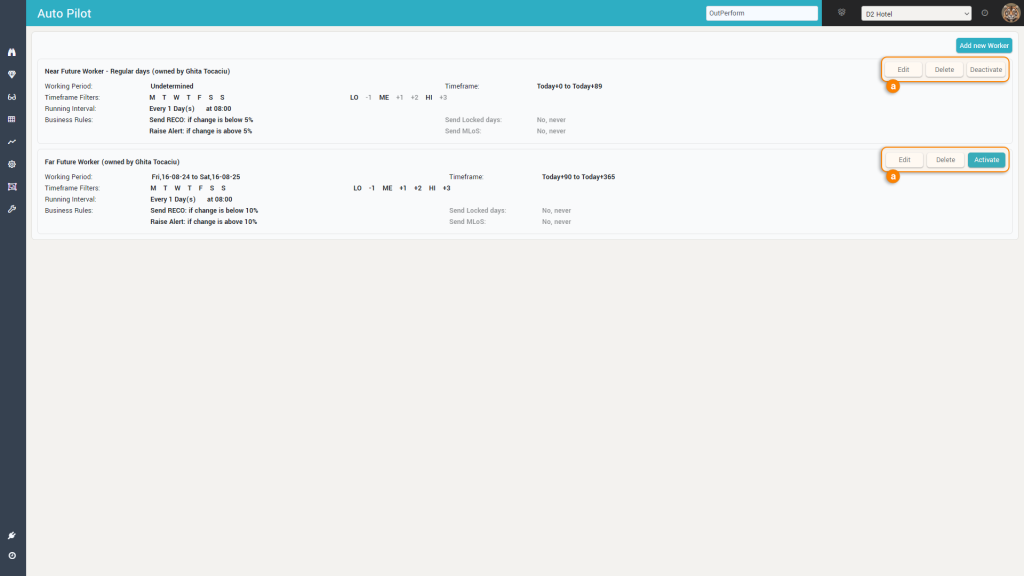
You can Edit, Delete or Activate/Deactivate each worker. By default, a newly created worker is deactivated.
Every time you create a new worker, or decide to activate/deactivate, edit or delete a worker, you will be prompted for your password (for security reasons):
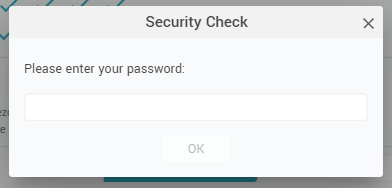
Remember: By default, a newly created worker is not active. You must explicitly activate the worker before it can do its “job”.