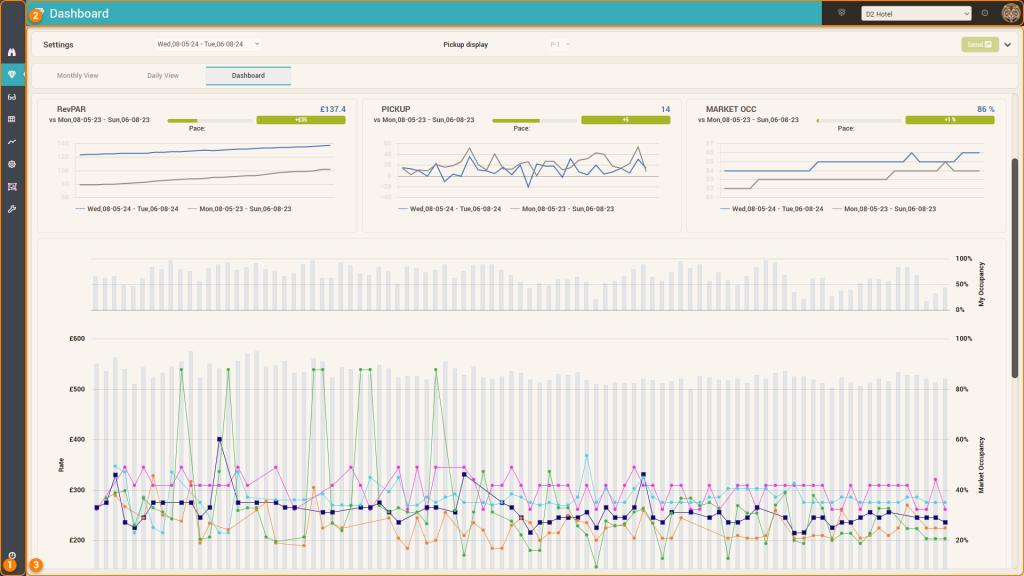
The layout of the application has 3 areas:
1. The Menu Bar
This area contains the main menu of the application. By hovering over the menu icon you can access the corresponding screen or a sub-menu is shown from where you can then access the desired screen:

At the very bottom of this section you can find a “clock” icon which will show (on mouseover) the current time in the timezone of the selected hotel. This is useful if the hotel you are managing is in a different country that uses a different timezone then where you are located:

2. The Top Bar
This area displays the name of the current screen and also shows a list of high-level options:

a. The MTM Widget
When you click the “box” icon, the MTM widget is loaded. You can find more information about the MTM Widget on its dedicated article (MTM Widget).
b. The Hotel Selector
When you click the dropdown selector, you can change the active hotel you are managing:
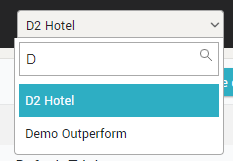
Within the dropdown, you can use the search box to filter the list of hotels by name.
c. The Notification Icon
The application has a built-in notification system that tracks and displays in this area all the actions that are done automatically by the system (e.g. data imports, RECO calculations, etc). The notification icon will pulsate when there are new notifications in the list and it will show a “badge” with the amount of new notifications:

When you hover the mouse over the icon, the list with the latest notifications is shown:

To the right of each notification, there are two icons that can be used to mark notifications as “read” (meaning they will not be displayed anymore): the left one can be used to mark the respective notification as “read”; the right one (with the “inverted” design) will mark ALL similar notification as “read”.
d. Your Profile Picture
Hovering the mouse over your profile picture will show a context menu where you can change your profile data, change various user preferences and log-out of the application:
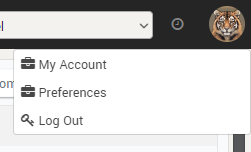
Depending on your user access, you may see more options in this context menu. You can read more about these options in the “Accounts and Preferences” section.
3. Main Screen Area
This is where the actual content of the selected screen is placed. Each screen will utilize this area differently.