Defining the rates for each room type, rate plan and occupancy as well as setting up restrictions like “minimum length-of-stay” and “open/close” is very easy with this screen. It has 3 main sections:

1. The Control Bar
The Control bar offers the following functions:

a. Timeframe
Users control the period of time displayed in the calendars below for each room type. The period is defined by selecting the starting month and then choosing the number of additional months.
Also in this section users can select if the calendars below will display DoW information or not (the “Show DoW” switch). This option allows for an more compact view of the calendars, considering that there are other visual indicators for the weekly periods (see more info in the “Calendars” section below).
b. Data Display Selection
This controls which data will be displayed for each “cell” of the calendars in the “Calendars” section.
The options that appear are the list of PAX that are available for the property (from 1PAX to the “Maximum Occupancy” PAX as defined in the “Settings > Basic” screen.
Also, users can choose to display the minLOS restriction data, the RECO data (for the selected PAX and minLOS) and the data that was last sent to the receiving system (or is ready “to be sent”). See below various “combinations”:
| 1PAX and 2PAX | + MLOS | + RECO | + (TO BE) SENT |
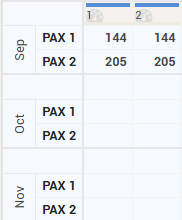 | 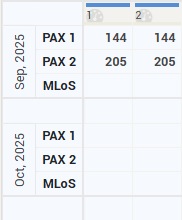 | 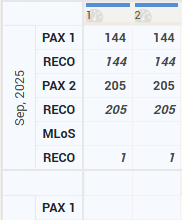 | 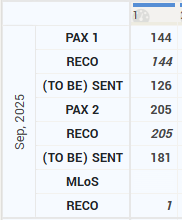 |
c. Bulk Edit
This action allows changing rates and restrictions for multiple arrival days at once. When clicked, the button opens the below popup:

The period for the bulk action can be a contiguous timeframe or multiple timeframes (which are added by clicking the ![]() icon.
icon.
With the “Days of Week” filtering option, users can mark which weekdays in the defined timeframe(s) will receive the bulk update.
In the room type table, users can input the new values to be applied in bulk for each data point. By clicking the “like” icon, the RECO values from every arrival day in the timeframe will be “applied” instead.
If input fields are left empty, the system will apply any formulas it finds. This means that for the system to apply all the formulas, it is sufficient to input the new value (or do a bulk “like” action) only for the reference room type, which is marked with a double border left-right: ![]() .
.
Users then must choose one of 3 bulk action behaviors:
- Change only on dates which are not locked – the default behavior; the bulk action is applied only for arrival days in the selected timeframe (and DoW filter) that are not “locked”. Days that are locked are left “untouched”.
- Change and lock all the dates selected – all dates (locked or not) get updated; they are also locked afterwards
- Change and unlock all the dates selected – all dates (locked or unlocked) get updated; any dates that were locked get unlocked.
Users can also decide if the action is to be performed for the dependent rate plans; in other words the dependency formulas will be applied automatically for all dependent rate plans based on the new price amount (or RECO). The default is to have this checked – unchecking will prevent dependency formulas to be applied so the prices for the dependent rate plans will not change.
Tip 1: When writing values in the input fields, it is possible to write basic arithmetic formulas. E.g. an input of “+20” will apply a +20 markup on all existing rates in the selected period. It is also possible to work with percentages: an input of “-5%” will apply a 5% reduction for all existing prices in the selected period.
Tip 2: In special cases when it’s needed to resend rates without changing the values (e.g. a “re-sync”), a bulk edit formula of “+0” will do the trick.
2. Rate Plan selection
This tabular section allows the selection of the rate plan for which the rates and restrictions are displayed in the “Calendars” section.
The first rate plan (first tab from the left) is always the “reference” rate plan selected in the “Room Types and Rate Plans” screen. The other rate plans are arranged in alphabetical order.
Attention: Only the rate plans that have been enabled in the “Settings > Offers” screen are displayed.
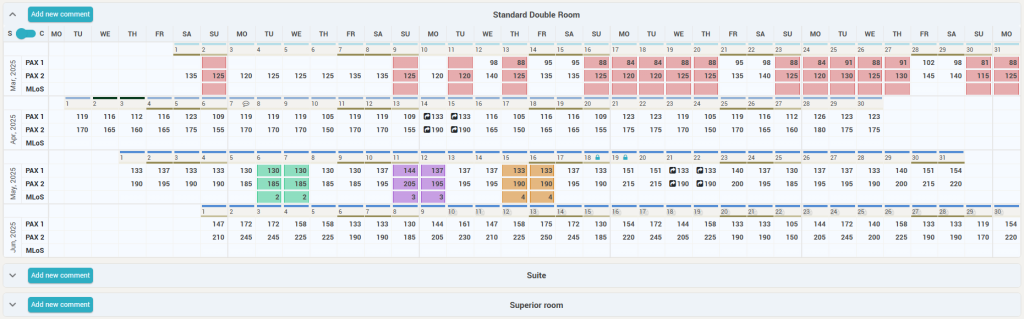
3. Calendars
The “Calendars” section is the main section of this screen. It contains multiple calendar “boxes”, one for each of the room types that have been enabled in the “Settings > Offers” screen.
The boxes are arranged vertically: the top box is for the reference room type (defined in the “Room Types and Rate Plans” screen. The other room types are displayed in alphabetical order:
Remember: Only one calendar “box” can be opened at any given time.
Each “box” displays a grid where the rows represent months (starting with the selected month in the control bar). The columns represent each arrival day for which the selected data is displayed.
“Box” level actions
There are a few “box” level actions (found in the top-left corner of each calendar box):
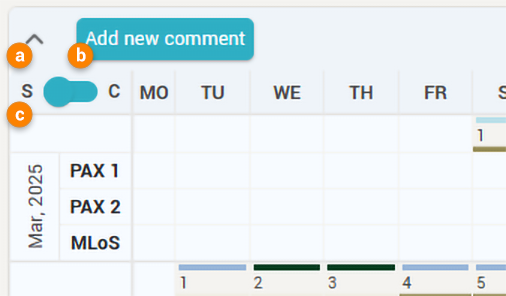
- a. Open/Close Box – this is the control for opening or closing boxes. When a box is opened, the previously opened box is automatically closed; thus at any time only one box is open.
- b. “Add new Comment” – allows quick access to add a comment. When clicked, the popup to add a comment is displayed:
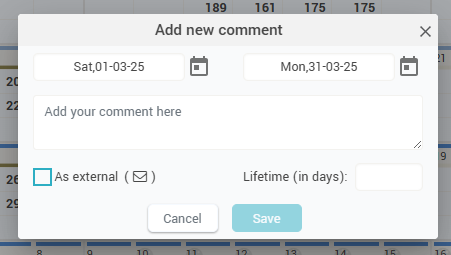
- More details on comments can be found in the “Comments” page.
- c. Display mode – the grid in each calendar box can be displayed in two modes.
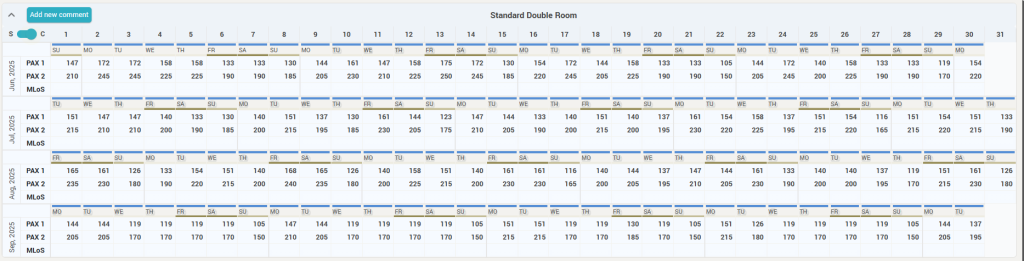
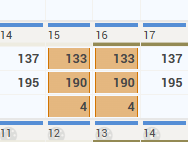
“S” for “Standard Mode”. In this mode, the cells for each row of the grid are aligned based on the day of the week:
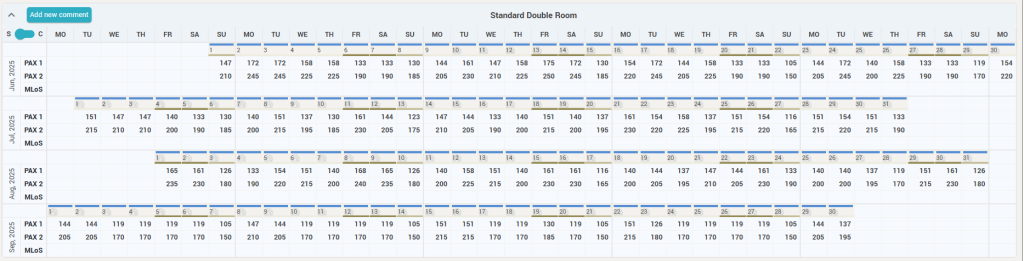
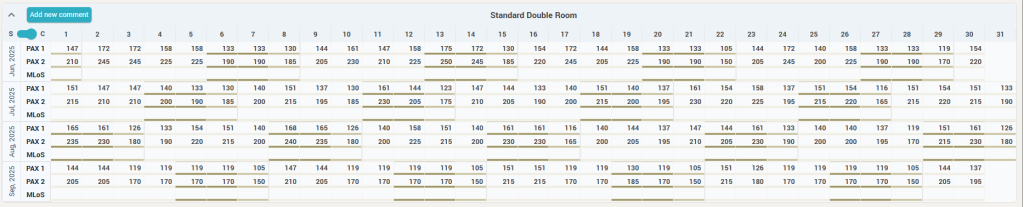
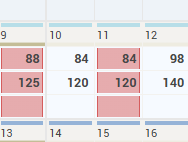
“C” for “Compact Mode”. In this mode, the cells for each row of the grid are aligned based on the day of the month:
In “Compact mode” and having the “Show DoW” switch (in the control bar) on “off”, the grid is even more compact:
Cell level actions
Each cell in the calendar grids has two sections:
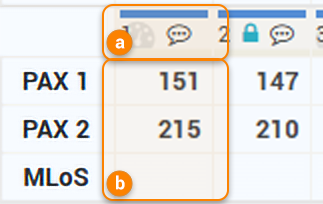
a. The cell header
Displays the day of the month (in standard mode) or the day of the week (in compact mode). The top border’s color represents the season or event category color. The bottom border has the color of the DoW, to highlight the weekdays vs weekends.
Hovering the mouse over the header section of a cell will show the “Mini Day Inspector” for the respective arrival day.
The header also has the following:
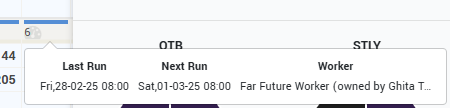
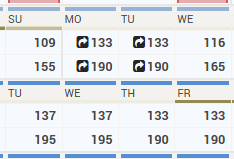
- if the autopilot icon (
 ) is displayed “behind” the day-of-month (or day-of-week) (like for the 1st of the month in the above screenshot), it means that the respective day is “controlled” by at least one autopilot worker. Hovering the mouse over the header when there is a worker defined will display (along with the mini day inspector) information about the respective worker:
- if the comments icon is displayed (
 ), when hovering the mouse over the header the app will show the comments for the respective date:

- If the date has been “locked”, the lock icon is displayed in the header (
 ).
).
- Remember: a “locked” date means that autopilot workers will not overwrite and send the existing price with the recommended price. Also, when performing Bulk actions in this screen (see above), there are some dedicated controls on how the bulk action should be performed based on the “lock” status of the dates in the bulk period.
Attention: the cell header is not displayed in Compact mode when the “Show DoW” option is “off”.
b. The cell contents
Depending on which data is selected to be displayed (in the control bar), the content area of the cell will show more or less data points.
When right clicking on any of the values, a context menu is displayed, showing the various action that can be performed for the respective arrival date. Below are all the possible actions:
| No action selected | Set minLoS to “2” | Set minLoS to “3” | Set minLoS to “4” | Apply RECO |
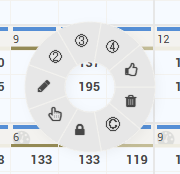 |  |  |  | 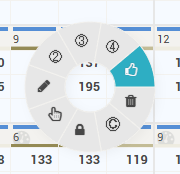 |
| Clear Restrictions | Set “Close” Restr. | Lock Date | Select period | Edit Value |
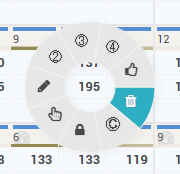 | 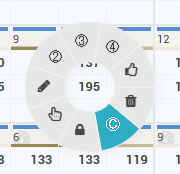 | 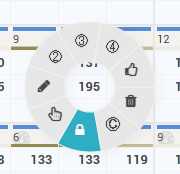 | 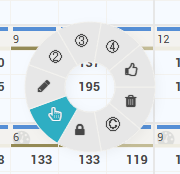 |  |
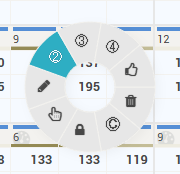
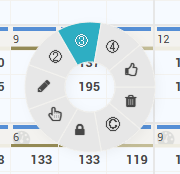
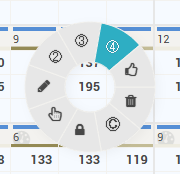
- Set MinLoS to 2,3 or 4 will quickly set the minimum Length of Stay restriction to the respective value.
- Apply RECO will quickly apply the RECO rate (and minLoS + Close if they exist) and get them ready for sending.
- Clear Restrictions will remove any minLoS or Close restrictions.
- Set “Close” Restriction will put a Close restriction on the respective arrival date.
- Lock date will lock that date for autopilot workers and bulk edit actions.
- Select period will allow the selection of periods in the grid. The first click selects the arrival day for the start of the period – the secondary click will select the arrival day for the end of the period. Once a period is selected, the “Bulk Edit” popup is presented for the selected period.
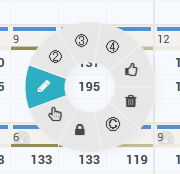
- Edit Value will allow in-place editing of the data points presented (custom rates and/or minLoS).
Tip: The last selected action from the context menu becomes the default action when left-clicking values in the grid. The default action for left click is also presented in a tooltip, see two examples below:
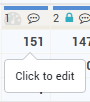 |  |
There are visual markers for the main restrictions in the form of dedicated background colors:
| MinLoS = “2” | MinLoS = “3” | MinLoS = “4” | “Closed” |
 | 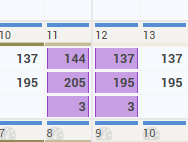 |  |  |
Also, when data is prepared for sending, the standard “![]() ” indicator is displayed:
” indicator is displayed:
Attention: The indicator appears only for room types and rate plans that are mapped for distribution (“Settings > Distribution“).
Remember: Any changes in the calendar grids for any of the room types and rate plans are not sent automatically. They are only “marked” for sending and “The SEND Button” must be pressed to actually send the new values.