In this screen, you manage the Room Types and the Rate Plans for the RMS application.
While it is important to create the same Room Types in the application as they are defined in the PMS system (at least the Room Types that actually represent rooms and not for example “PayMaster”), when it comes to Rate Plans you only need to create the Rate Plans that are to be managed within the RMS. This means only Rate Plans that are “yield-able” and have a dynamic pricing strategy should be created (like BAR, NonReF, etc). Of course, you can manage all Rate Plans in the RMS, but it would be of little to no added value to manage for example corporate or negotiated rate plans in the RMS.
The screen looks like this:

1. Room Types
This is the section where you manage the Room Types. By clicking the “Add new” button you add a new Room Type in the app:
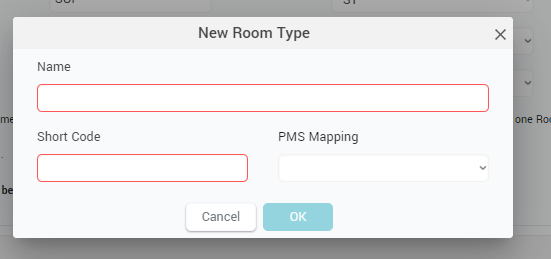
You must give the new Room Type a name and a short code. Also, it is important to map it to a PMS Room Type code that came from the PMS Data Stream. Once finished, click OK and you will see the new room type in the list.
Remember: you must also click the “Save changes” button in the top-right corner of the screen to actually save the new room type in the database.
You can always change the name, short code or the mapping for any of the room types defined by editing the values in the list; once finished, remember to click the “Save changes” button in the top right corner of the screen.
The “Reference” column in the room type list marks the room type for which the RECO algorithm calculates the optimal price. This will be the room type that stands as “master” for all the room type price dependency formulas. There can be only one reference room type.
Best practice: it is suggested that the Room Type with the biggest inventory is selected as Reference room type; in other words the room type that sells the most and usually sells last (most often the “Standard Double Room”).
You can map multiple PMS room type codes to the same room type in the RMS; the system will “summate” the data received for all the mapped PMS room types and “assign” it to the RMS room type. You may need this if you recently changed your room type structure in the PMS (“STD OLD” + “STD”) or simply if you wish to manage 2 or more PMS room types altogether (e.g. “STD DBL” + “STD TWN” as from a pricing point of view these two room types are the same and the separation is only needed for accurate room assignment at check-in).
Remember: you cannot save the list of room types if there is at least one room type having no PMS mapping, empty name, or empty short code.
You can ignore the “Default Single”, “Default Double” and “Default Triple” columns for now. They will be used in a later version, to enhance the “Group Analysis” functionality.
You can delete room types by clicking the red icon in the list.
Remember: the “Add new” button will be disabled if there are no more PMS room types to map.
2. Rate Plans
In this section of the screen, you manage the Rate Plans. It is not mandatory to add here all the rate plans you are selling in the PMS; only the “yield-able” ones are needed – practically the ones that have a dynamic price that is linked to the price optimization calculation (e.g. “BAR”,”NonRef”, etc and not corporate or negotiated rates).
When you click the “Add new” button, a popup appears where you can add the new rate plan:
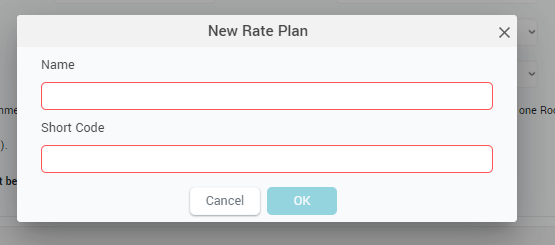
Only a name and a short code are required. Click “OK” to see the new rate plan in the list.
Remember: click the “Save changes” button in the top-right corner of the screen to actually save the new rate plan in the database.
In the list you can edit the name and short code for any of the defined rate plans.
The “Reference” column designates the rate plan for which the RECO is calculated.
Best practice: It is suggested to select the rate plan that is most often open for sale and is not restricted (e.g. the “Best Available Rate”).
You can also define for each rate plan if it includes breakfast and if it’s restricted or not; by “Restricted” we mean a rate plan that when booked restricts the booker to either pay in advance, or does not allow cancellation or modification, etc.
You can delete a rate plan by clicking the corresponding red icon in the list.
Remember: click the “Save changes” button in the top-right corner of the screen to actually save the new rate plan in the database.
3. PMS Room Type Settings
By clicking this button the following popup appears:

Here you can define the inventory for each room type as it stands in the PMS. This is important for the system to be able to calculate occupancy per room type and other related KPIs.
Also, you can choose if a PMS room type is to be mapped or not in the RMS application. The app will notify you at every login if there are unmapped PMS room types; to avoid unwanted notifications you can select here the PMS room types that you will never wish to map to RMS room types.
Remember: The app will notify you when new Room Types have been received via the PMS data stream. It is important to create new room types in the app to map the new PMS room types, or to mark them that they are not “Used for Mapping”.